


As commonly acknowledged, a dash cam has become an essential accessory for car owners, especially for commercial drivers such as taxi or Lyft drivers. Connecting the dash cam to the vehicle's cigarette lighter is the most convenient and common way to power up the dash cam, but achieving 24/7 surveillance can be challenging. To address this concern, we'd advise you to install the hardwire kit.
Benefits of Installing the Hardwire Kit
With the hardwire kit in place, the advantages become rather apparent: continuous surveillance, stable power supply, parking mode support, reduced risk of battery drain, clean and discreet installation, increased tamper-resistance. It offers an efficient and reliable solution for seamless dash cam operation and enhances overall driving safety and security. A hardwire kit is generally acknowledged as the best option to power your dash cam.
Introduction of Hardwire Kit
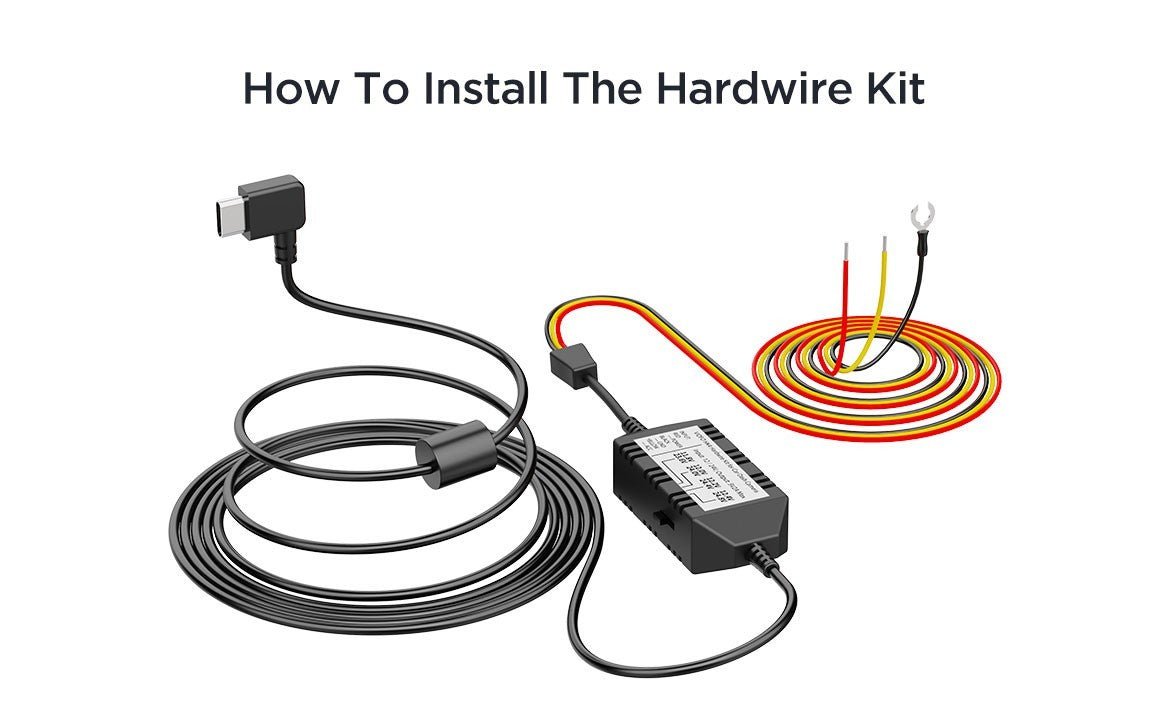
A dash cam hardwire kit enables a direct connection between your dash cam and your car’s electrical system, providing continuous power to the dash cam for the parking recording function.
The hardwire kit comprises three wires: Battery, ACC, and Ground. Each wire is appropriately labeled to indicate its respective function. The red wire connects to the fuse that maintains constant power at all times (always hot). The yellow wire connects to the accessories fuse. Lastly, the black wire serves as the ground connection and can be attached to any bolt within your vehicle.

Compatibility of dashcam models:
HK6 Hardwire kit: A329S Series
HK5 hardwire kit: VS1
HK4 hardwire kit: A119MINI / A119 MINI 2 / A229 / A229 Plus Series / A229 Pro Series / A229 Ultra Series / A329S Series / T130 / WM1 / A139 / A139 PRO
HK3-C hardwire kit: A139 / A139 PRO
HK3 hardwire kit: A119 V3 / A129 DUO / A129 DUO IR / A129 PLUS DUO / A129 PRO DUO
Before installation, you need to order the hardwire kit and fuse tap.
How to Install the Hardwire Kit
Step 1: Locate your fuse box and fuse type
Fuse boxes and fuse types vary not only from car to car but also from year and model. Therefore, it’s important to know which fuse type your car uses to ensure that your dash cam installation kit can plug into your fuse box. The best way to know the exact fuse type that you need is to open your fuse box and take a look.


(Tip: There are four main fuse types found in vehicles today, ATC, ATS, MICRO2, MINI. The MINI is the most common fuse type. )
Locate the fuse box in your vehicle and panel covering it. Please be aware that the fuse box's location may vary depending on the car model, so it is recommended to consult your vehicle's user manual for precise instructions. Generally, you can find the fuse box under the glove compartment, in the trunk, or in the engine bay.


Step 2: Identify which fuse is Battery & ACC
Tools you will use: multi-meter, circuit tester.

It's essential to exercise caution when working with fuse slots. Some slots govern critical systems like airbags, stability control programs, and the horn, which should not be tampered with. On the other hand, slots controlling less critical functions like the radio or sunroof are generally safer alternatives for any modifications. Always prioritize safety and adhere to the manufacturer's guidelines when dealing with fuses.

ACC (yellow):
To locate the ACC fuse slot, you can use the circuit tester or multi-meter to ensure there is no power at the fuse when the ignition key is off, and power is present only when the ignition key is turned to the run position.
Take circuit tester for example. Place the tip of the tester on the exposed metal part of the fuse and you will find that the light of circuit tester will illuminate when power is present, and it will not light up when the power is off.
Battery (red):
When testing to locate the constant fuse slot, please ensure that the ignition is completely off. Look for a fuse that is live (allows electricity to flow) even when the ignition switch is in the off position. Place the tip of the tester on the exposed metal part of the fuse and you will find that the light of circuit tester always illuminates when the engine is off.

Recommended fuses as below:
ACC signal: Fuse Audio, Fuse Power Socket or Fuse Power Mirror.
Battery signal: Fuse Audio, or Fuse Hazard.
Step 3: Remove selected fuses
Having successfully identified the ACC fuse and the battery fuse, we can now proceed to the next step.
Make sure the key has been removed from the ignition. Using a fuse puller or a pair of pliers, gently remove the fuses you identified in step 2.

Place the fuses you previously removed into the installation kit's add-a-fuse circuit. Please note that both fuse slots must be filled—one for the original vehicle circuit and one for the dashcam. Do not use an empty/unused fuse slot without adding the proper vehicle fuse; otherwise, the circuit will not provide power.


Step 4: Crimp Add-A-Fuse kit & hardwire kit
Next, we crimp. Trim off some of the rubber tubing on your hardwiring cable to expose some wire, then the exposed portion of the hardwire cable is to be connected to the other end of the fuse tap. Crimp them down together to make the connection. Ensure nothing is loose after crimping with a simple tug on the add-a-fuse.


Step 5: Connect fuse tap into the fuse slot
Finally, slide the fuse tap cable back into the fuse slot you just removed.

Step 6: Connect ground wire
With the ACC and Battery connections completed, you can proceed to establish the ground connection. Carefully place the black Ground connector under the head of a ground point screw or bolt ensuring a clean electrical contact and tighten the screw to secure.

Step 7: Test
With all the wires properly connected (Red, Yellow and Black), plug the hardwire kit into the camera, then start the vehicle to check if it powers up the dashcam. If the dashcam powers on, you can do further test to see if it can enter the parking mode. First, please check if parking mode is enabled in the menu, then turn off the engine and wait for several seconds. The power LED light will flash for a few seconds, and the parking mode icon will appear on the camera screen when it switches to parking mode. And there will be a voice notification "parking recording started" (for the camera supporting voice notification).
LED Indicator on Hardwire Box
HK3 / HK3-C / HK4 / HK5

▪️When working normally (5V output): The LED stays on.
▪️When low voltage protection is triggered: The LED stays on for about 1 min 30 sec before both the dash cam and the LED turn off.
HK6

▪️When working normally (5V output): The LED stays on.
▪️When switching modes/gears: The LED quickly blinks twice.
▪️When low voltage protection is triggered: The LED blinks once per second until the dash cam turns off, then the LED turns off.
Final Thoughts
The hardwire kit enables continuous parking monitoring with the engine turned off; meanwhile, it will cut off power automatically when the voltage drops to the configured value to prevent draining your battery. In case you cannot finish all the above steps by yourself, we sincerely advise you to consult the local auto shop and have the hardwire kit installed by professionals.
Below are detailed installation videos for further references.
Hardwire kit installation: https://www.youtube.com/watch?v=CaV2394A28U
Hardwire kit installation: https://www.youtube.com/watch?v=DlzB63-lCmE
Fuse tap connection: https://www.youtube.com/watch?v=ETG3ND09A4g